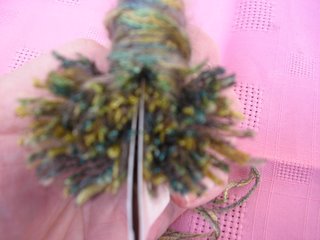
Pom Tiddly Pom-Pom
Making pom-poms should be simplicity itself. I'm sure I was taught to make a pom-pom in primary school and while I haven't exactly made a career of pom-pom making, I'm pretty sure I have made my fair share of pom-poms over the years.
Imagine my surprise, therefore, when the making of the first pom-pom for the "Frill Scarf" went completely pear-shaped. In fact, the thing wasn't shaped like a pear - it just fell to bits completely. There is no photograph. It went in the bin; in the big bin; the outside bin; long before the camera could be deployed. There were short strands of yarn everywhere. It was a right mess. It also used up plenty of yarn and necessitated a trip to the LYS to buy another ball of Impression. I was a very, very good girl and contented myself with that one ball of yarn, although I did collect a 2mm addi circular (for the WRS) that has been on order for ages and a 4.5mm addi circ for use with the black Frost and Ice (hoping to make the thing go faster, but see below).
I got to thinking about the "traditional" way of making a pom-pom - you know, with the double circles of cardboard with the centres cut out and you wind yarn round for ever and end up having to use a needle to poke the yarn through the hole in the centre that becomes smaller and smaller as you go on. That method seems to me to be flawed in all sorts of ways. One way is that when you cut around the circumference of the circle and ease the two cardboard circles apart,ready to tie a strand of yarn round the middle of the pom-pom to hold the whole thing together, it is all too easy for the card to slip right off the cut ends of the yarn (particularly when you have a small diameter, as in this case) and then you end up with a pile of short strands that really, really want to be a pom-pom but can't quite hold it together.
So, it seems to me that you need to have the "tying yarn" round the yarn-to-be-cut, before you cut the yarn. And I don't see why you have to wind the yarn round the circle and cope with that infuriating hole in the middle.
This is what I did.
Cut a piece of card about 6in/15cm long and as deep as the desired diameter of your pom-pom (5cm in this case):
Fold the card in half (short side to short side) and poke a hole through both layers on the mid-line and near the fold. Cut through both layers along the mid-line up to the hole (and no further, do not cut the whole lot in half).
Thread the yarn you are going to use to tie the middle of the pom-pom so that it rests in the hole:
Wrap the yarn round the card:
Don't wrap too tightly. If you are hoping to make another pom-pom the same size then it might be a good idea to count how many wraps you do, otherwise your pom-poms might look un-even. (Ask me how I know this.)
Bring the two ends of the "tying yarn" together at the right of the card and shuffle (technical term) them down the slit in the card and tie - just once, you can tie it tighter later.
Poke your scissor blade down between the two layers of card at the top and cut the yarn:
Cut again at the bottom. Tighten the "tying yarn" if necessary. Ploof up (technical term) the pom-pom. Trim if necessary. Stand back and admire your creation:
Not a bad pom-pom and a heck of a lot better than the first miserable attempt.
I've just spent quite a large chunk of time putting right a mistake in the black Frost and Ice which came about due to overambition - "I can knit black mohair when I've just come back from work at mid-night and had several glasses of wine."
Guess what, I can't.
All done, now though. Not perfect, but it passes the running horse test.


5 comments:
I love the idea that your kitchen is turning into a feline harbour of ill-repute! Has cheered me right up although of course I'm not happy it has happened to you personally. Pooch agreed to us getting a cat once we have our own place yesterday - hoorah!
There is another point about the 'traditional' pompom that has just occurred to me - it's never going to be a nice spherical ball, because the inner layers (ie the ones nearer to the card circles) of yarn are going to be shorter than the outermost ones (the ones that you have to force through ith a needle) - so what you actually get is an egg shape, and loads of trimming to have to do. Think your method sounds a lot easier (and neater)
Thanks for this. I've tried making the traditional pompon without any luck, next time I'll try your method.
I've avoided making pom-poms for years because of one failed attempt, so I'm very grateful that you've shared your wisdom on the subject!
I forgot to mention in your last post, Beelzebub on the bread machine is so cute. They turn up in the funniest places.
You OK? Missing your blog!
Post a Comment