Thursday, April 08, 2010

Running to Stand Still

Is what I feel like at the moment.

Tickets for the Ravelry Weekend (13th - 14th August) at the beautiful Stirling University Campus went on sale at the beginning of April, so there has been a lot of work to do.

I'm still working in the yarn shop:


It actually looks much better than this now because more things are arriving every day. We are the only UK stockist of Grignasco, beautiful yarn at a reasonable price, which takes me back to my Italian days - I used it all the time. We are getting some Noro in and (at my instigation) Dorothy Sieman's beautiful Fiddlesticks patterns and yarn.

We also have plenty of Jamieson & Smith:


I'm still knitting things for the shop, too.

This:


is a rather dark shot of the "Helleborus Yoke" cardigan by Matthew Gnagy in Knitscene, Spring 2010.

I used Manos del Uruguay Wool Classica (available at Yarn Gathering) and had the body knitted in no time. Of course, I had to modify the thing - it's worked sideways from the right front and he suggests keeping the yoke stitches live throughout but casting off the stitches of the body at the side seam, only to cast them on again to start the back. I don't think so. I just carried on and ignored him. (Something I do in daily life, too.) I also did a provisional cast on for the sleeve and then grafted the seam at the end. In this endeavour I was greatly aided by an article in the latest Interweave Knits by TechKnitter. Her blog is well worth a look if you need to be reminded how to do some fancy manoeuvre (of even if you haven't a clue how to do it and need to be led by the hand). Thanks to her, the graft is invisible to the naked eye - so invisible that I didn't take a picture of it because I couldn't find it (and now the garment has gone to the shop, to star in the window.)

The collar of the Helleborus Yoke was an entirely different matter. The first attempt followed the pattern as written. No go. The second attempt reduced the number of rows in the straight section and used a chain selvedge. No go. Then I looked to Ravelry and found that most people had been having problems with the collar - one knitter even left it off altogether because she couldn't fathom it. The designer chimed in with his corrections. One word of advice - don't even think about doing it his way. That was my third attempt and it was fearful. On the fourth attempt I decided to go my own way (see "carry on and ignore him" above). This is how it's going to stay because I've had enough of frogging - it's not perfect but it is wearable. (I know "it will do" is not the attitude but I really am at the tearing of the hair stage.)

What I did (if anyone is interested):

Work 5 repeats of the corrected short row increasing section; work 1 short row repeat without increasing (to the centre back); work 1 short row repeat without increasing; work 5 repeats of the short row decreasing section.

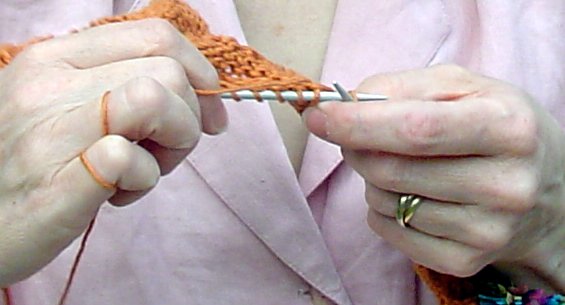
This is the start of the collar:


and that's how it goes on.

That's enough for now - I'm going up to the shop to teaching children to knit - snaring them early.

We're going to Stirling this weekend for a recce, so pictures of that next week (if I remember the camera!)

Thursday, April 01, 2010

Here Again

Yes, I know, I know. Long time, no hear.

It's been far too long for catch-up so I'm just going to start again.

Some Twilley's Freedom Spirit


has been maturing in my stash and being remarkably quiet as to what it would like to be when it grew up.

Finally, the yarn spoke:


Stefanie Japel's Textured Circle Shrug. The pattern is available for free on the Lion Brand website (you do have to register). Just be warned that there is a lot of 1 x 1 ribbing, followed by a lot of seed stitch (which is also 1 x 1 ribbing in essence). If I'd realised there was quite so much of it, I might not have started. However, I'm very pleased I did.

Here's the front:


We did try to get a picture with my head on it but according to #1 daughter photographer I kept "pulling a funny face".

I added the button - sewn through both fronts; no button hole. It just looked didn't look right open - too well-endowed, I think.

You don't know the biggest news - I started working in a yarn shop. Talk about a kid in a candy shop - I spent a whole day counting balls of yarn and making lists. Complete bliss. Of course, it is also extremely dangerous - the stash is growing exponentially.

I made this:


(see exchange above for explanation of lack of head).

The back:


to go on display. It's the Transverse Cardigan from the Spring 2010 Interweave Knits. I used Malabrigo Worsted in "Dusty" (available from Yarn Gathering) and had it knitted in about four days. Come and see it for yourself if you are passing Earlsdon Street in Coventry.

I've also been very busy with KnitCamp organising. August doesn't seem all that far away.

That's all for now. I can't promise I'll blog every day but I really will make an effort to blog more than once every Preston Guild.

Tuesday, December 08, 2009

Disaster, Darling

Remember the green Kimono Jacket? I took it off the other evening and there it was:


Arrgghh!

But I have the solution - a little pamphlet by Rena Crockett (who I imagine in the Wild West, planting seeds, raising chickens, making and mending). It's called Flawless Knit Repair and it walks you through the process.

First, remove the stray bits of yarn:


Then pin to a backing fabric:


Unpick carefully, so you have some yarn to weave in at the end.


The yarn will be all kinky (as you see, above), so you can steam it carefully to straighten it.

Stabilize the hole with contrasting sewing thread:


Weave the new yarn (which you have carefully preserved from the time when you knit it in the first place) under and over the sewing thread:


Use a crochet hook to recreat columns of stitches:


Kitchener each stitch to the corresponding loop at the top of the column.

Here we are partway through:


The tension is looking a bit wonky (tt) but it can all be evened out at the end.

This is it at the end:


The only thing left is to close up the slits at each side and weave in the ends.

Weaving in of ends (not one of my favourite pastimes) took ages - there are two strands at each end of every row; there were five rows: twenty ends to weave in.

However, I don't think it looks too shabby:


Yes, I know, some of the stitches in the light yarn should have been purled . While it is possible to do this, and Rena Crockett explains all, I just didn't have the strength to work it out.

I pretty pleased with the way it turned out.

If you ever have a disaster, darling, there's a very good Knitty article you might want to refer to.

Saturday, December 05, 2009

Soay Aran

I've finally managed to get started on the man's Soay Aran. It took me quite a while to decide on which cables to use and the exact placement of said cables. I'm basing the jumper on Janet Szabo's "Son of Aran" project. It is made entirely without seams, so right up my street.

Here are the honeycomb cables, which form the centre panel on both back and front:


This:


shows the 14 stitch braided cable, taken from Alice Starmore's "Aran Knitting", flanked by two 8 stitch plaits, from the same book. These cables are on either side of the honeycomb panel and also form the shoulder saddles and will continue down the sleeves.

I feel as if I've knitted the whole thing twice over because I have made several mistakes while crossing cables and have had to drop down about three repeats and knit them up again. The moral of this story is to look at your knitting and not go into a trance.

I've also started Ysolda Teague's Vine Yoke Cardigan, which is going to be on display in the shop. We thought the shop might be open next week but, due to one thing and another, it probably won't open until the New Year. This is a good thing, in a way, because it gives me a bit more time to get it finished.

Progress to date:


That's the right front and sleeve.

It's knitted all in one piece (no sewing!) and uses short rows to good effect. Reading various discussions on the pattern, some people say it comes out quite large - mine looks tiny, so let's hope it does grow in length (as the pattern says it will).

Here's the bottom edge:


and this is the yoke:


which looks a little plouffy (technical term). I am hoping that all will become smooth in the blocking. I think the cardie is designed to be worn with negative ease, so it will be blocked on the body, if you follow.

Work on the KnitCamp continues - the class schedule is now available to download and we are slowly getting the tutor pages up. I think it's going to be such fun - and Lixie, it might seem a long way but there may be a coach going from London. Imagine the fun - knitting for hours with lots of other knitters; eating cake; drinking one's chosen beverage. Sounds like bliss to me.